Skip to content

Baking Cookies in a Toaster Oven

mm Marcus Chen
10 min read

The Countertop Cookie Method That Actually Works

Key Takeaways

  • Toaster ovens bake excellent cookies when you adjust for close heating elements and small cavity size.

  • Preheat fully, use the middle rack, and rotate once to avoid hot spots and scorched tops.

  • Light-colored pans prevent over-browned bottoms; parchment paper improves release and browning consistency.

  • Reduce temperature 25°F when using convection; pull cookies when edges set but centers look slightly soft.

  • Chill dough briefly before baking to tighten butter and prevent runaway spread in the small, hot cavity.

  • Never taste raw dough—raw flour and eggs carry pathogens; use edible dough products for snacking.

Why Toaster Ovens Demand Different Technique

Understanding the physics of countertop baking makes the difference between perfect cookies and burnt edges

Hardware and Temperature Control

Start with the smallest rimmed baking sheet that fits with clearance on all sides; a quarter-sheet pan is ideal in many models. If your toaster oven came with a pan, it's often thin and dark, which can over-crisp the bottoms. Switching to a heavier, lighter-colored sheet is usually the fastest fix for cookies that burn underneath before the tops set.

Parchment paper is great for easy release and consistent browning, but it must be kept flat and away from exposed heating elements. Never let paper ride up near the top element, and don't use parchment on broil.

Many countertop ovens include convection or an air fry fan mode; when that fan is running, cookies brown faster and can finish sooner. A solid rule of thumb from multiple major oven manufacturers is to reduce the set temperature by about 25°F when using convection for baked goods like cookies.

If your recipe says 350°F on a conventional oven, try 325°F with the fan on, or keep 350°F with the fan off as your baseline. Either approach can work; the point is consistency so you can dial in your specific toaster oven over two or three batches.

Rack position matters more than most people think because the top element is so close. For most toaster ovens, the middle rack is the sweet spot for cookies: far enough from the top element to avoid scorching, close enough to brown evenly, and centered for airflow.

If your toaster oven has a dedicated cookie setting, it typically assumes a middle rack placement. If you only have two rack levels, pick the lower one for your first run and accept that you may need a minute longer.

Toaster ovens are brutal on warm, greasy dough because the outside sets fast while the center is still spreading. If you're using homemade dough, chilling it even briefly helps a lot. Ten minutes in the fridge while the toaster oven preheats can tighten butter, reduce runaway spread, and give you thicker, chewier cookies.

If you're using store-bought refrigerated dough, keep it cold until the last moment. If it warms on the counter while the oven preheats, you're almost guaranteed thin cookies with over-browned edges.

Small-Batch Chocolate Chip Cookies

Yield 8 cookies Prep 15 minutes Cook 9–11 minutes Total 30 minutes Difficulty Easy

Ingredients

  • 4 tablespoons unsalted butter, melted and cooled
  • 3 tablespoons granulated sugar
  • 3 tablespoons packed light brown sugar
  • 1 large egg yolk
  • 1/2 teaspoon vanilla extract
  • 1/2 cup all-purpose flour
  • 1/8 teaspoon baking soda
  • 1/8 teaspoon baking powder
  • 1/4 teaspoon kosher salt
  • 1/3 cup semisweet chocolate chips
  • 2 tablespoons chopped walnuts
  • Flaky sea salt for topping
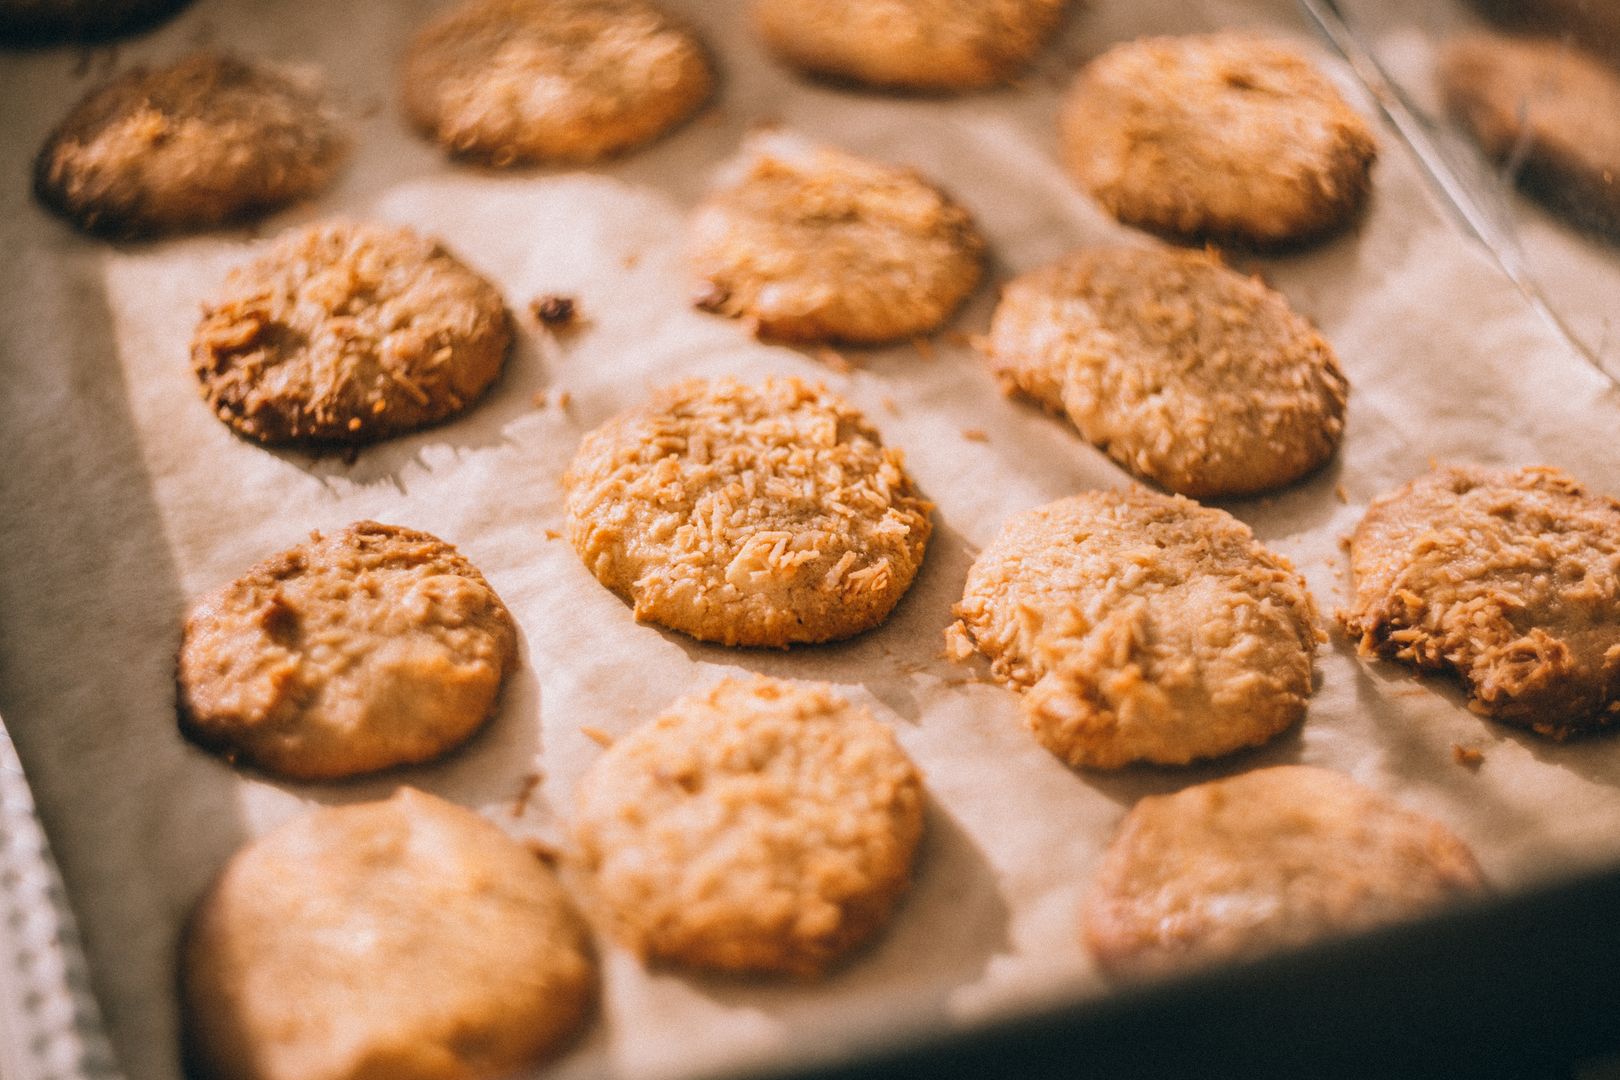
Chocolate chip cookies on cooling rack
Small-batch chocolate chip cookies fresh from a toaster oven, showing golden edges and soft centers with visible chips and walnut pieces

Baking Instructions in Four Clean Stages

Follow these four stages to bake perfect cookies in your toaster oven without guesswork or burnt edges.

  1. Preheat and Prep

    Heat the toaster oven to 350°F with the rack in the middle position, and line a small light-colored sheet with parchment.

  2. Mix the Dough

    Stir the melted butter with both sugars, then mix in the egg yolk and vanilla; fold in the flour, baking soda, baking powder, salt, chips, and walnuts.

  3. Portion and Bake

    Scoop 8 mounds, spaced well apart, and bake 9 to 11 minutes until edges are set and centers still look slightly soft.

  4. Cool and Finish

    Rest on the tray 5 minutes, sprinkle a few flakes of sea salt, then move to a rack to cool fully.

Reading the Doneness Cue

Most people overbake because they wait for the tops to look fully done. In a toaster oven, by the time the tops look perfect, the bottoms are often one shade away from bitter. Pulling the tray when the cookies still look a little underdone in the center gives carryover heat time to finish the job without burning.

Eight One-Change Fixes for Common Problems

  • Cookies burn on top: lower rack one level
  • Cookies burn on bottom: use lighter sheet pan
  • Cookies spread too much: chill dough 10 minutes
  • Cookies stay tall and raw: flatten slightly before baking
  • Pale cookies: increase temperature 10–15°F
  • Dry cookies: pull 1 minute earlier
  • Uneven browning: rotate tray halfway through
  • Stuck cookies: use parchment, not foil

Troubleshooting Uneven Browning and Hot Spots

Most people change multiple variables at once—isolate one fix per bake to dial in your toaster oven

Pan Color and Rack Adjustments

If your cookies are pale on top but dark on the bottom, your pan is likely too dark or too thin, or your rack is too low. Move the rack up one notch, switch to a lighter sheet, and consider a double-pan hack: place your cookie sheet on top of a second empty sheet to insulate the bottom.

If your cookies brown on top before they spread, your rack is too high or the top element is running aggressively. Drop the rack and, if your model allows it, choose bake rather than broil-like modes.

If one side browns faster, rotate the tray 180 degrees halfway through—most toaster ovens have a clear hot corner. When people say baking cookies in a toaster oven is unpredictable, it's usually because they're changing multiple variables at once.

About foil: it's tempting, but it tends to over-brown the bottoms and can reflect heat unpredictably in a small oven. If you must use foil, dull side up is a common approach, and keep it tightly wrapped to the pan so it can't flutter near elements. Parchment is usually more forgiving.

If your toaster oven has convection, decide early whether you'll use it for cookies. Convection can be excellent for evenly browning multiple items, but cookies are delicate: too much airflow can set edges quickly and make centers rise oddly.

My practical rule is simple: start with the fan off for your first batch, especially for drop cookies, then experiment with the fan on once you've nailed timing. If you do bake with convection, lower the set temperature by roughly 25°F and begin checking for doneness earlier than the recipe suggests.

Sugar type changes toaster-oven behavior. Higher brown sugar ratios generally keep cookies softer and help with browning; higher white sugar ratios can increase spread and crisp edges. If your toaster oven runs hot and you keep getting lace-thin cookies, you may just need colder dough, a slightly lower temperature, or a dough with a touch more flour structure.

Performance problems often look like bad recipes until you clean or recalibrate the basics. Crumbs on the bottom of a toaster oven can smoke and create bitter odors that cling to baked goods. Keep the crumb tray clean, wipe the interior once it's fully cool, and don't let burnt sugar accumulate on pans.


Pre-Bake Six-Point Check

Run through this checklist before you hit start to avoid the most common countertop-oven mistakes and ensure consistent results.

  • Rack is in the middle position
  • Pan fits with side clearance
  • Parchment is flat and trimmed
  • Dough is cool, not greasy
  • Timer is set for minimum time
  • You will rotate once midway
Toaster oven rack setup for cookies
Toaster oven interior showing middle rack position with light-colored baking sheet and properly spaced cookie dough portions on parchment paper

Making Toaster Oven Baking Repeatable

The upside of using a toaster oven for cookies is obvious: it's fast, energy-efficient for small batches, and it won't heat your whole house. The downside is that it's less forgiving—especially if the heating elements cycle aggressively or sit very close to the rack. You'll also bake fewer cookies per batch, and you may need to accept a rhythm of rotating and checking early. If you bake frequently, those trade-offs are small; if you only bake once or twice a year, it can feel fussy until you lock in your own house settings for rack height and timing. If you want the shortest path to reliable cookies, commit to a baseline and iterate: pick one dough, one pan, one rack position, and one mode, then adjust only one variable per bake. After two or three trays, you'll know exactly how your toaster oven behaves—and you'll be able to bake cookies with the same confidence you'd have using a full-size oven, just with quicker preheats, less waste heat, and a lot more control over a small, satisfying batch.

mm

Marcus Chen

Editor

Marcus has spent over a decade testing kitchen appliances and home products, combining his engineering background with a passion for practical, real-world performance. He believes in rigorous hands-on testing and transparent comparisons to help consumers make informed decisions.